A clean install of macOS Mojave 10.14 on a fusion drive
June 8, 2019
Today I performed a clean install of macOS Mojave 10.14 on the fusion drive of my Mac Mini 2014. Below I have written down my notes.
Downloading MacOS Mojave from the App Store
Get macOS Mojave in the App store. The download is just over 6GB. When the installer starts, quit the installer. The installer will remain in the Applications folder.
Creating the USB installer
Insert a USB stick of at least 8GB. Launch Disk Utilities, select the thumb drive in the left pane and select Erase.
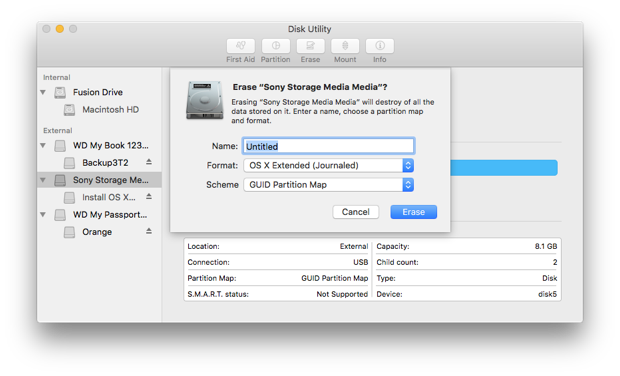
Name the stick "Untitled", select "OS X Extendend (Journaled)" as the format and "GUID Partition Map" as the scheme and click the Erase button. When finished, click Done and close Disk Utility.
Launch Terminal and paste the following two lines:
cd /Applications/Install\ macOS\ Mojave.app/Contents/Resources/
sudo ./createinstallmedia --volume /Volumes/Untitled/
This will erase the thumb drive and copy the installer:
Ready to start.
To continue we need to erase the volume at /Volumes/Untitled/.
If you wish to continue type (Y) then press return: y
Erasing disk: 0%... 10%... 20%... 30%... 100%
Copying to disk: 0%... 10%... 20%... 30%... 40%... 50%... 60%... 70%... 80%... 9
0%... 100%
Making disk bootable...
Copying boot files...
Install media now available at "/Volumes/Install macOS Mojave"
Install macOS Mojave 10.14
Restart your Mac and hold down the Option key as soon as you hear the start up sound. Use the keyboard arrows to select "Install macOS Mojave". After a short while a window is shown. Select the "Disk Utility" option.
Select the fusion drive of your Mac, in my case "Macintosh HD", and select Erase. I choose APFS for the format.
When done, return to the macOS Utilities screen and select "Install macOS".